|
In order to add a custom report to the Custom Reports menu in
BusinessVision, you will need the following information before you
start:
1. The "rpt" filename of the report
2. The location on your network or local hard drive
where you will save the
"rpt" file
3. The name of the report
4. Whether or not the report uses a "Criteria Template", and if
so, which one
5. Which module the report is to be added to |
When I send you a custom report to add to your BusinessVision, I
will furnish you with all this information, although in some
situations I may not know where your custom reports are stored on
your network or local hard drive (point #2 above).
WHEN I EMAIL YOU A CUSTOM REPORT...
Please SAVE (do not open) the "rpt" file that is attached to the email I
send you. Save it to the location I specify in the email. To do this,
RIGHT-CLICK the attached file and select "Save As" from the menu
that pops up (assuming you are using Outlook or Outlook Express -
other email programs may behave differently).
STEP BY STEP INSTRUCTIONS:
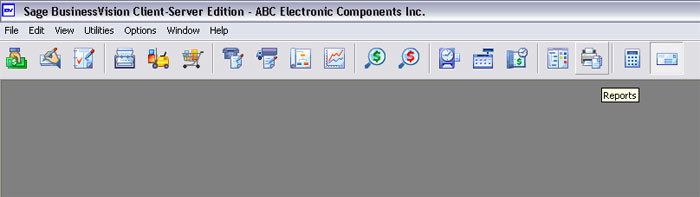
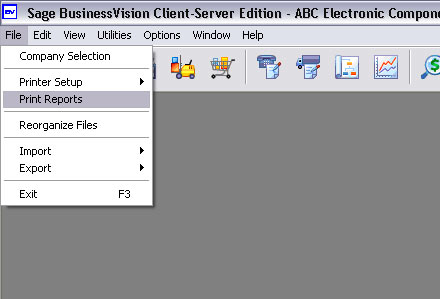
1. In BusinessVision, go into the reporting module, either by clicking on the Reports
icon or through the menu: File, Print Reports
OR
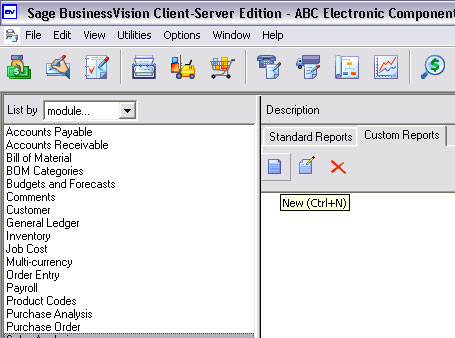
2. From the list of modules on the left, select the module into
which this custom report belongs. For the purposes of this example,
I will use Sales Analysis.
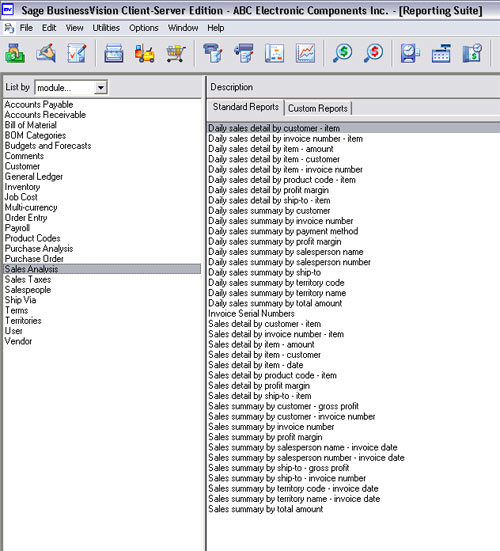
3. Click on the "Custom reports" tab
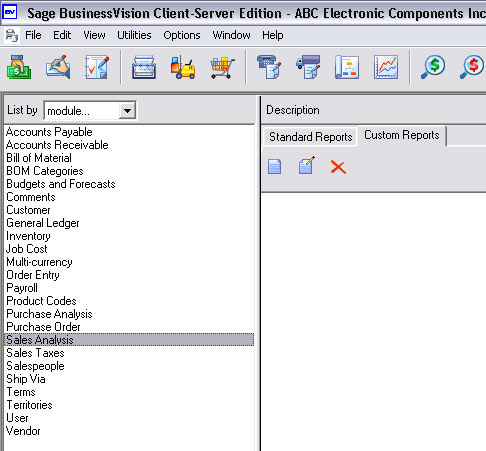
4. Click on the "New" button - this is the one at the far left
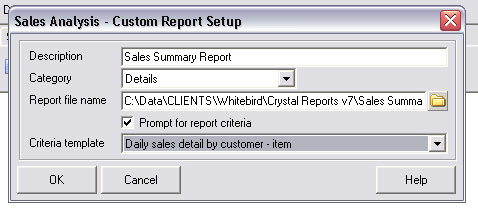
5. The following dialog box will appear:
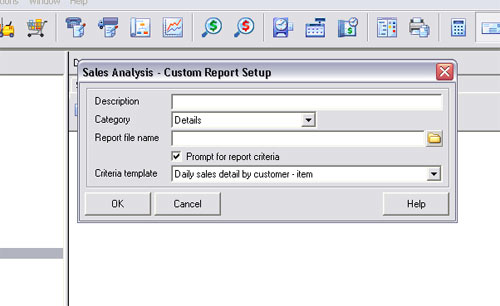
6. In the Description field, type whatever name you want to use
for the report. This is what will appear in the Custom Reports menu.
In this example, it is a "Sales Summary Report"
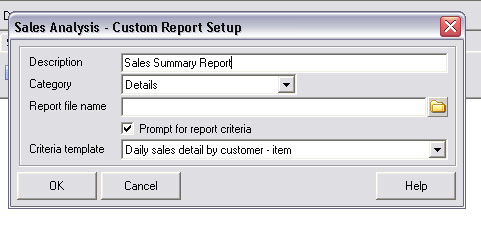
7. Ignore the Category field.
8. "The Report file name" is the most important field here. This
is where you "point" to the "rpt" file that defines the report.
Click on the little folder icon at the far right of the "Report file
name" field. The following box will appear:
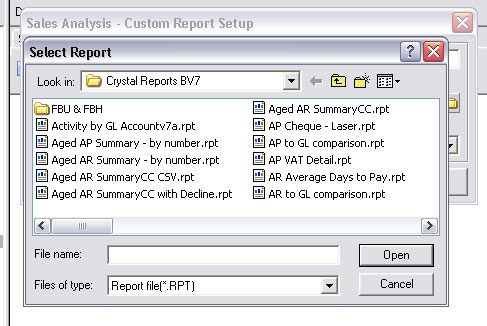
9. Now it gets a little bit tricky (for those of you who are not
as familiar with Windows files and folders, that is!). Using the
"Look in" box, you will need to navigate to the folder that contains
your custom reports files. I cannot tell you where that is for you
in this example, because it is in different places for various
clients.
Click the small down arrow at the far right of the "Look in" box and
a list of folders and drives will be displayed. This is a standard
Windows dropdown list box (as it's called), which you can use to
navigate to the location of your custom report files.

Here's another sample of what you might see when you click that down
arrow:
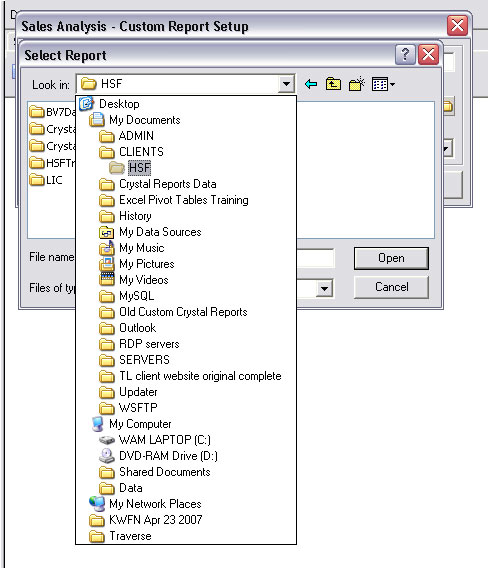
PLEASE NOTE that what you see WILL BE DIFFERENT than what is shown
here.
You simply use this box to navigate to wherever your "rpt" files
(custom reports) are stored.
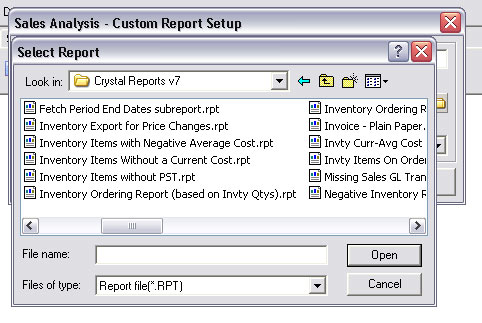
10. You will hopefully eventually find the required folder, as in
the following example:
11. Select the appropriate "rpt" file from the list. In our
example, we are looking for the "rpt" file called "Sales Summary
Report.rpt"
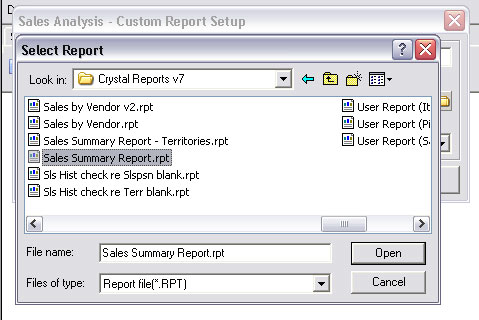
12. Click the "Open" button. You will be taken back to the
previous box, and the "Report file name" field will be filled in for
you.

13. In this next step you will need to know whether or not this
report uses a "Criteria template".
If it does not (which is usually the case with reports created by
Wildwood Canada), then uncheck the "Prompt for report criteria"
checkbox.
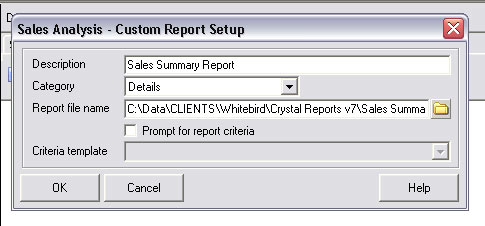
If this report DOES require a Criteria template, then you must
ensure that the "Prompt for report criteria" checkbox is checked,
and then select the appropriate one from the dropdown list by
clicking the small down arrow at the far right of the "Criteria
template" field:

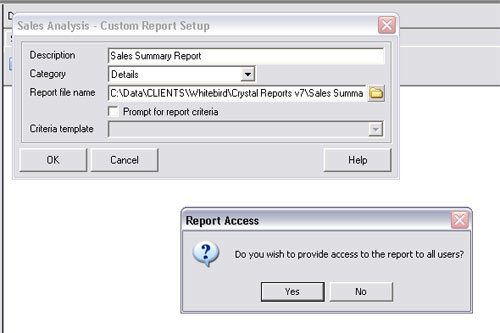
14. Click the "Ok" button. (You're almost done!)
You will be asked, "Do you wish to provide access to the report to
all users?". If you want all users of BusinessVision to be able to
access and run this report, click the "Yes" button. If you want only
yourself to access and run this report, click the "No" button. You
can assign permissions for this report to individual users in the
User Details module later.
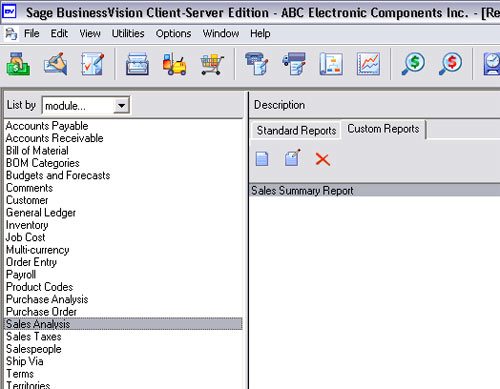
15. That's it! You are done. The custom report now shows up on
the Custom reports menu. Other users may not see this report listed
until they log out and back into BusinessVision.
To run the report just highlight it and double-click it, just like
the Standard Reports.
But please see the next point below...
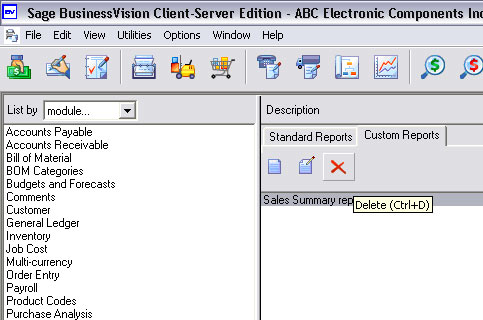
16. ONE LAST IMPORTANT NOTE: That "X" icon on the right (see
below) is actually a "Delete" button. Fortunately, on
recent versions of BusinessVision you will be asked to confirm the
removal of the custom report from the Custom Reports menu.
 | 
